The BAGSTER® tank cover
Thanks to its multi-layer construction and an exceptionally soft inner fleece lining, the tank protection cover provides lasting protection for the tank's paintwork and serves as the foundation for a highly sophisticated luggage system. Tank bags to suit any requirement can be attached in seconds using just four mounting points. Compared to other luggage solutions, this system offers a decisive advantage: there is no need to remove the tank bag to refuel the vehicle; instead, it can simply be flipped forward towards the handlebars using the two front mounting points.
Until the late 1980s, tank protection covers were made exclusively from black synthetic leather and did not necessarily cover the entire tank surface; rather, they protected the paintwork primarily in the areas where the rider's knees made contact and at the points where the tank met the seat. Today, we can replicate the factory paint finishes and designs of almost every manufacturer and model using a palette of around 100 colors. You can find an overview of these colors—which can also be used to create custom, bespoke designs—in our color chart for tank protection covers.
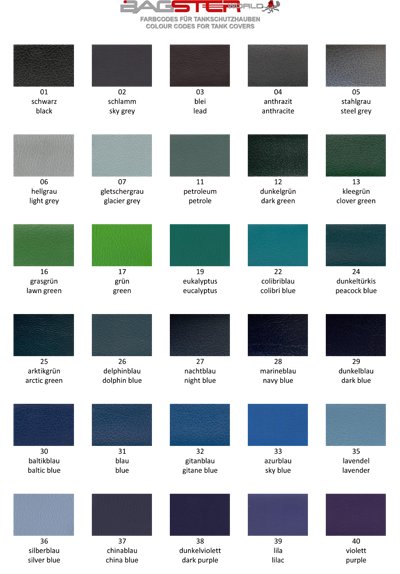
Click on image to get a colour survey as PDF
The following colours for tank protection covers are currently not available:
GLACIER GREY, NIGHT BLUE, CHINA BLUE, LILAC, SAFFRON YELLOW, YELLOW, SURF YELLOW, BUTTERCUP YELLOW, DAFFODIL YELLOW, NICKEL, GOLD, CASPIAN BLUE, LEMON YELLOW, ORANGE 'REPSOL', PEARLY SKY BLUE, SULPHUR YELLOW, LIGHT ORANGE, METALLIC BROWN, CANDY GREEN.
When ordering a tank protection cover containing these colours, we are currently making the following substitutions:
LILAC → PURPLE
ORANGE 'REPSOL' → ORANGE
PEARLY SKY BLUE → BLUE
CANDY GREEN → PERLY GREEN
The BAGSTER® tank cover
Initial assembly
Initial assembly
Over 90% of our tank covers are designed based on the same principle, and installation is generally very straightforward. While it would be ideal to provide specific installation instructions for each individual cover, this has unfortunately not yet been implemented. We therefore aim to provide the most comprehensive universal installation guide possible. Should you nevertheless encounter difficulties during installation, please contact us; we can usually answer your questions with the help of photos or drawings.
Please strictly observe the following instructions:
- Initial installation should be carried out at ambient temperatures well above 20°C—ideally on a tank heated by sunlight, ensuring the cover itself has also reached a significantly higher temperature from sun exposure. Under no circumstances should you use a heat gun or similar device to heat the tank and/or the cover.
- The tank must be thoroughly cleaned and, if necessary, treated with hard wax before installing the cover.
- Remove the seat or the front seat cushion.
- Position the cover and "massage" it into the correct position using the palms of your hands. Never use the tension straps to position the cover!
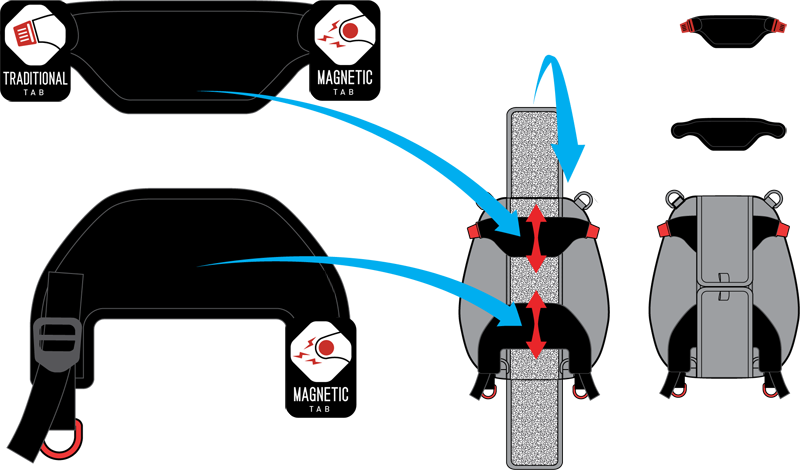
The following sketch illustrates the installation of a tank protection cover (dark gray) or the universal EASY mounting systems (not offered by us) on the tank.

Front mounting
- There is a very long nylon strap located at the front left or right side of the cover: the strap is first routed downwards and then between the frame downtube and the lower triple clamp to the other side of the tank cover. Here, there is a strap tensioner through which the nylon strap is threaded as shown in the illustration, though it is not yet tightened.
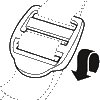
- There are two straps with hooks on the front of the cover; these straps are sewn to the cover at a specific angle. Route these straps downwards in the designated direction. There, you will find a mounting point for the hook—such as a motor mount or similar component.
- The cover features straps with punched holes at the front, or alternatively, has no straps at all, with holes punched directly through the cover material; it is secured using screws attached to the tank or adjacent fairing components. The screw locations are easy to identify intuitively. You may need to replace the stock screws with ones that have a 5 mm longer thread, as the original ones may be too short. These screws are not included in the delivery..
Side mounting
- Hook-based attachment: Depending on the motorcycle model, one or two straps with hooks are attached to each side of the tank cover. These hooks are primarily attached to the tank's flange, though sometimes to fairing components or auxiliary frame elements. The straps are tensioned evenly in a crisscross pattern using minimal manual effort and are secured with a strap lock (FIXLOCK).
- Fastening without a hook: If there is no hook at the end of a tensioning strap, it is either
- to push it through the underside of the tank to the other side, where it is then guided through the belt lock (the process is made easier if you loosen the tank's usually only central screw and lift it slightly) or else
- the strap has a punched hole, allowing it to be attached to this motorcycle model using a standard screw.
- "Anchor or clamp mounting": If the cover has a strap with a sort of "nylon rope" sewn into the end to form a thickened section, the adjacent side panel must be detached and pried outward slightly. The thickened section is positioned beneath the panel so that it acts as an anchor.
- Attachment loop: This type of attachment consists of a strap sewn firmly to the cover, featuring an adjustable loop at the end; it is typically secured to frame rails running just below the tank.
Rear mounting
Not every cowl requires additional rearward-facing straps. Where such straps are necessary, they feature either hooks that attach beneath the seat or front seat cushion to the forward section of the rear subframe, or a punched hole through which the fuel tank mounting bolt is passed. Alternatively, a longer strap attached to just one side of the cowl can be routed beneath the rear subframe rails to a strap adjuster on the opposite side.
Final tensioning
Once the correct positions for all mounting hooks or straps have been determined, the actual tensioning process begins. At this point, it is worth reiterating a crucial note regarding temperature: the tank cover becomes more flexible and stretchable when warm. Ideally, the cover should be installed—and the tank itself should be warm—after exposure to sunlight. Attempts to install the cover at low temperatures rarely yield satisfactory results; the cover will not fit snugly, leading to unfounded doubts about the accuracy of the fit.
Tensioning is performed alternately in the longitudinal and transverse directions, in a crisscross pattern, and requires very little physical effort. The cover is then slowly pulled down toward the bottom edges, a process that should be assisted by pushing with the flat of the hand. Please note that the tensioning straps serve only to secure the cover; therefore, excessive tension on the straps must be avoided. Typically, the cover will not extend all the way to the bottom edges of the tank; this is technically unfeasible, particularly when using tensioning straps with hooks.
The BAGSTER® tank cover
Cleaning and care
Cleaning and care
BAGSTER® tank covers are extremely durable. Never use abrasive cleaners or products containing solvents; instead, clean them regularly using only lukewarm water mixed with dish soap or a mild soapy solution. A very soft nail brush or dish brush can be used to remove dirt from the textured recesses of the leather-like surface. In general, the tank cover can remain on the tank during routine motorcycle maintenance. Once or twice a season, however, the cover should be removed and cleaned—including the underside—in a bucket of water. It can even be washed in a washing machine using a liquid detergent for delicates (max. 30°C, no spin cycle). The cover should always be thoroughly cleaned after long rides in the rain, particularly when exposed to road spray kicked up by vehicles ahead, as dissolved dirt particles may have worked their way underneath the cover along with the water.
The BAGSTER® Tank cover
Choosing the Right Tank Bag
Choosing the Right Tank Bag
In principle, any tank bag from the Traditional tank bags category can be attached to the tank covers. Only tank covers designated as "TRAIL" are unsuitable for the current range of system tank bags, as the distance between the front and rear bag mounts has been reduced on these models. For "TRAIL" classification covers, smaller tank bags from our Universal tank bags range are attached using the "TAB TRADITIONAL" option—a type of adapter.